Since my school year finished at the end of June, I’ve been
reflecting on my first year using a 3D printer with 4th and 5th
grade students. I must begin by first
stating that I am in no way an expert in 3D design/printing. I’m simply an
elementary tech coach/teacher who wanted my students to experience the world of
3D printing. I actually had no idea what I was doing at first but jumped in
anyway because I wanted my students to experience the design process first
hand.
Here’s what I learned about 3D printing with elementary
students:
1.
Designing a unique product for 3D printing can be tricky for 10 and 11 year
olds.
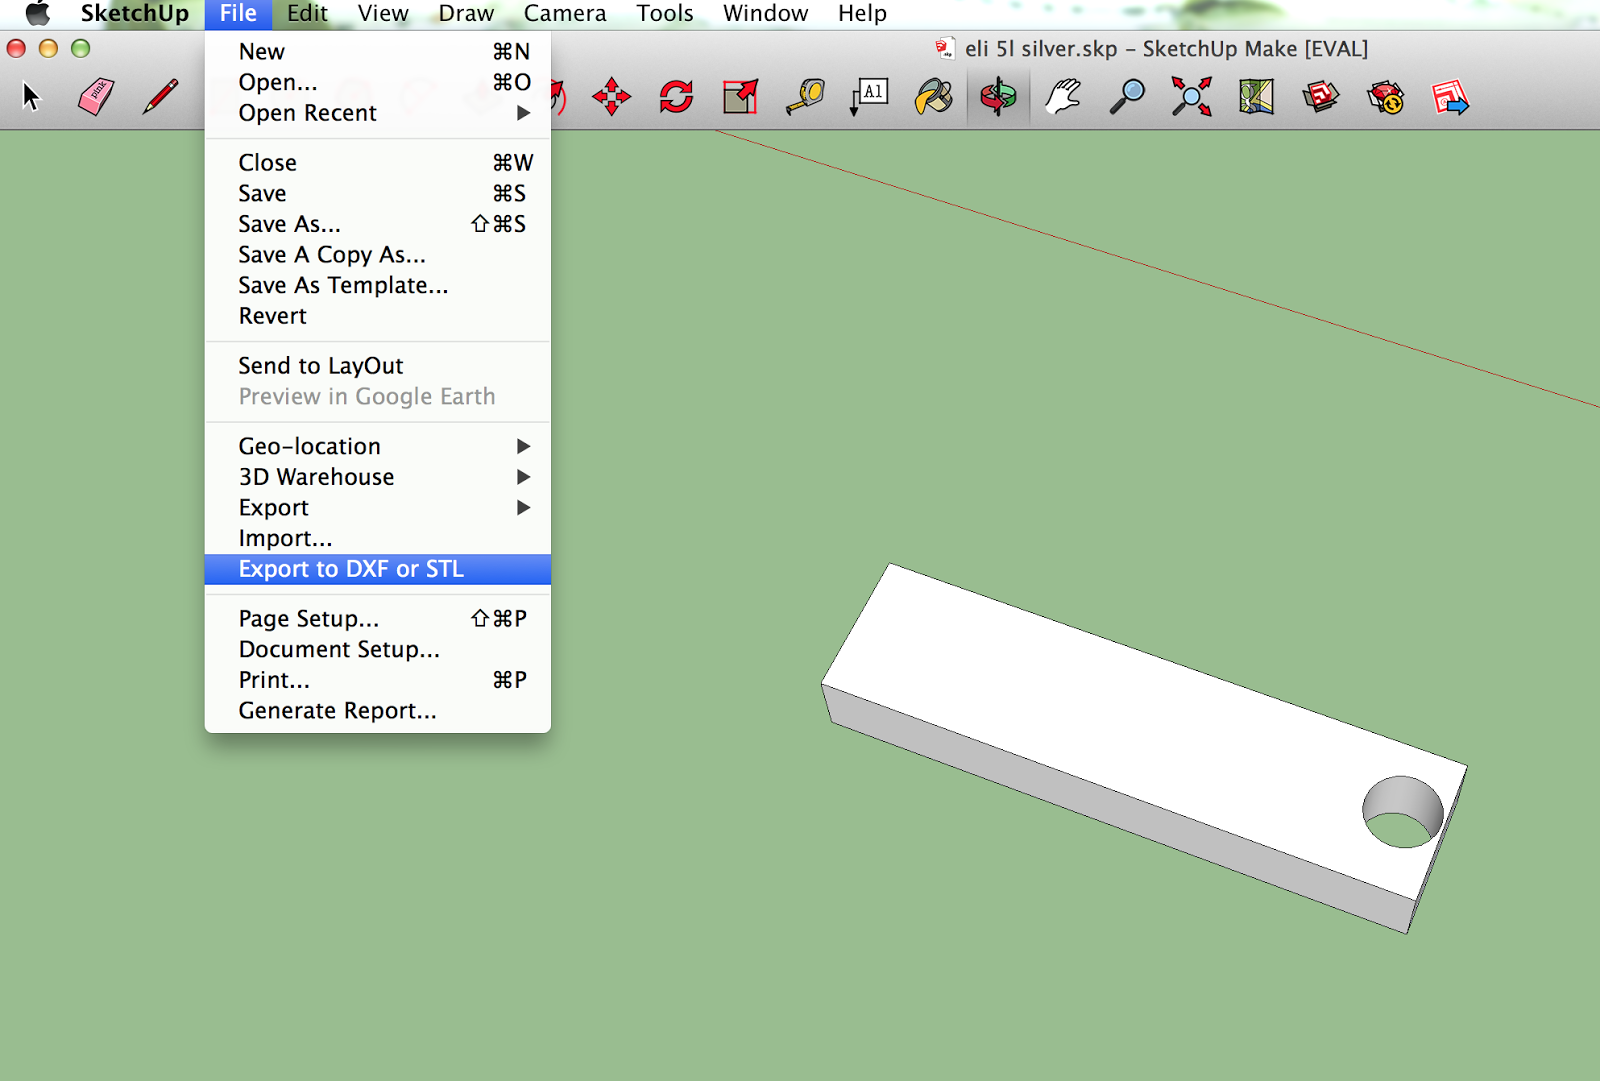
Students had to identify a problem and then create something
using SketchUp to solve their problem.
Ideas ranged from pencil holders to earbud organizers to knitting needle
guides. Creativity wasn’t an issue with my students. What was more challenging
was using the software to actually design their products. I observed many
students having to simplify their designs or make changes based on their
comfort level with the program. Expert users did emerge in each of my 8 classes
and they were eager to help their classmates as needed. I must explore other 3D
modeling programs that may be simpler to use or more appropriate for my elementary
students. Maybe just spending more time exploring within SketchUp is needed to
truly grasp the tools. In the very least, I will revisit the expectations for
both grade levels and determine if adjustments should be made based on the student
feedback I received.
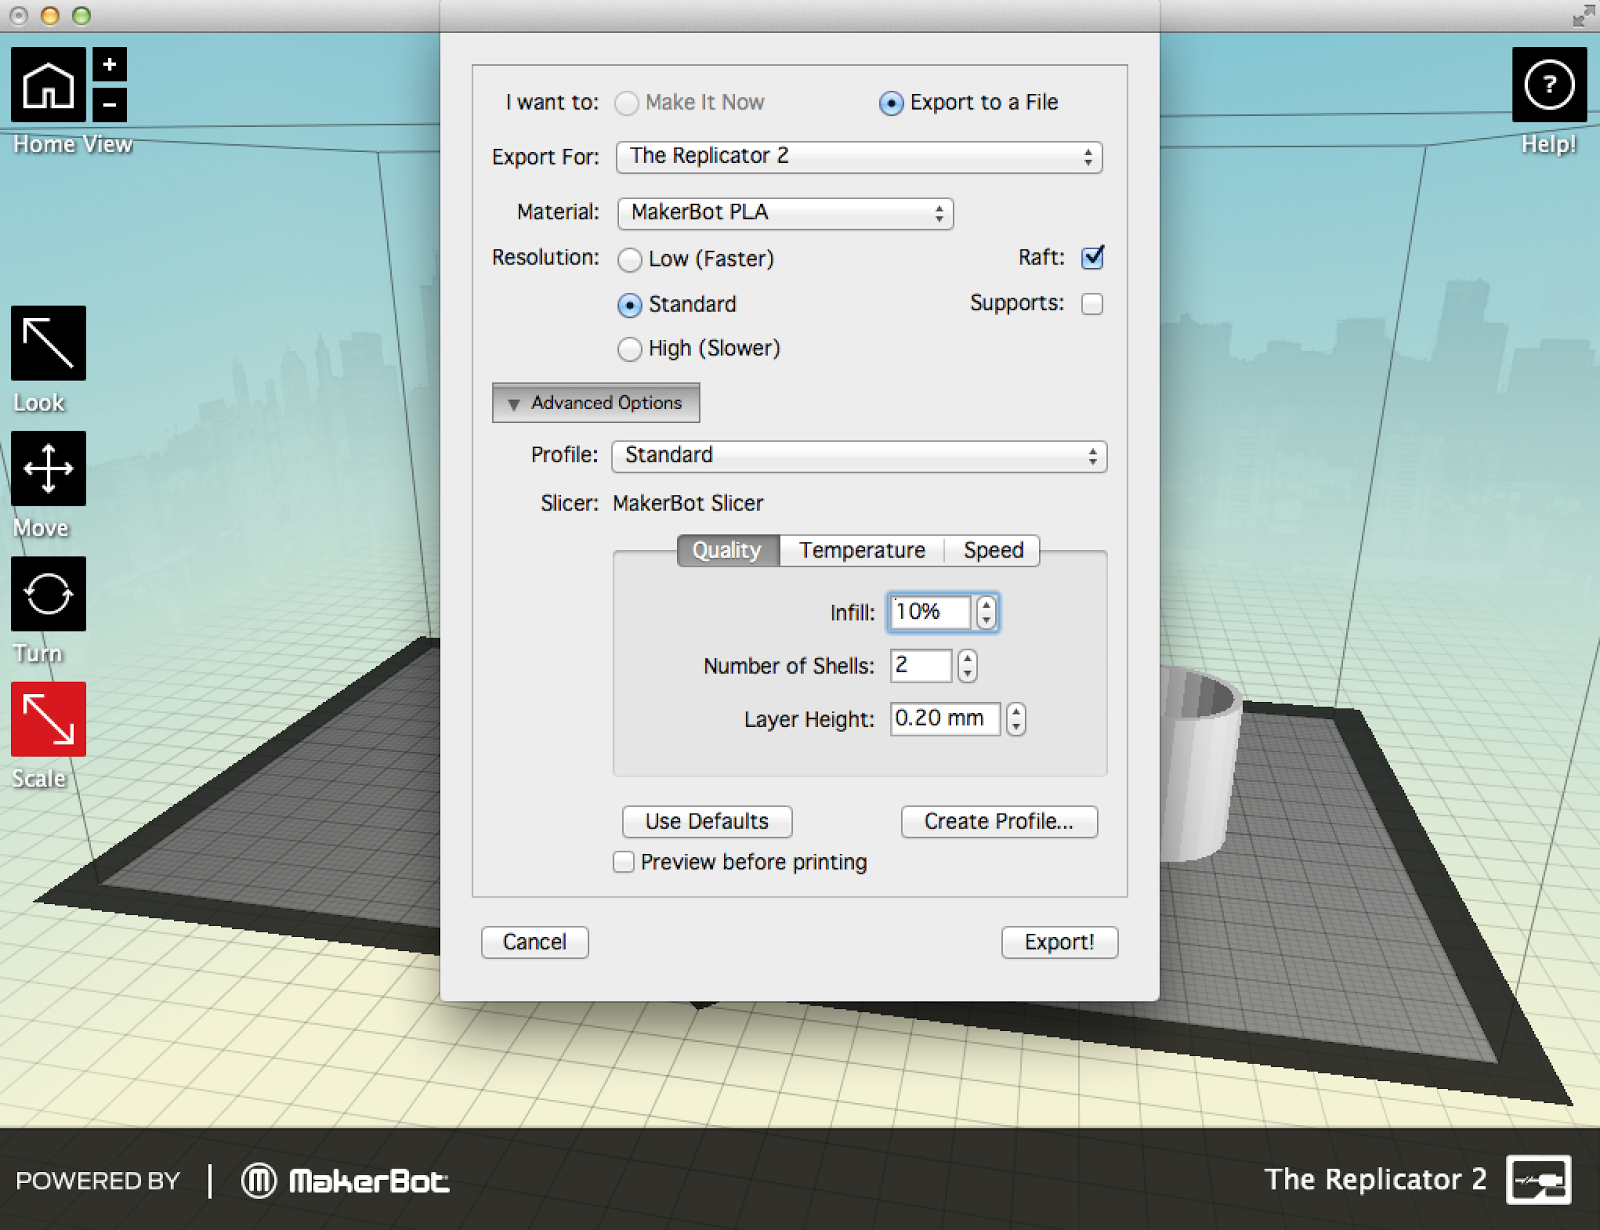
2. 3D Design and printing takes a long time from start to finish.
Because I only see my students biweekly, the challenge was
getting each of them to complete a design and then print it within a timely
manner. The first steps in the process, identifying a problem and brainstorming
ideas, took one class period of 60 minutes to complete. The next step of
actually designing the product using the 3D modeling software took another one
or two class sessions to complete (60-120 minutes). I worked with approximately
180 students on this project and most of them didn’t actually see their own
concept being printed. This is because their projects often took two to three
hours to print! On a good day, I could print three or four designs. Sometimes,
I was lucky if one finished before the end of the school day. Needless to say,
I had to develop a system for printing (save files by student name/color
choice, group colors together on SD cards, have multiple SD cards available for
saving/printing) and even then I didn’t finish everyone’s prints. It didn’t
help that the printer wasn’t working for several weeks. I truly felt I failed
the students who didn’t leave with their tangible product. Next year, one of
two things must happen: students’ creations will either have to fit a specific
size criteria before printing or we start earlier in the school year to allow
more time for printing.
3. The 3D design challenge is real-world application of skills at its
best.
By combining problem solving with project based learning,
students used logical, spatial, design thinking and math skills to develop
their products. Students were engrossed in this project! From the moment I set
up the 3D printer in the tech lab, students wanted to print something, anything.
When I posed the design challenge to these fourth and fifth graders, every
single one of them tried their very best to design a cool, yet useful, product.
They manipulated shapes on a plane to get their design just right. They
measured their designs using millimeters, centimeters, and/or inches using the
virtual tape measure. They scaled their designs up or down. Some had to go back
into the program and revisit the measurements if they had a “design flaw.” I
was so impressed with their determination to get their designs just right and I
think it was because it truly meant something to them.
4. One must not be afraid of the 3D printer.
I consider myself to be pretty tech savvy. I can figure out
a program or online tool without reading directions. I’m like the kids and will
search for a YouTube video to help guide me along. Inevitably, the 3D printer
will have an issue and you will need to troubleshoot or take it apart to
address it. The support team at MakerBot was awesome and helped me via Twitter,
email and even over the phone. I can’t say enough about their patience with a
newbie like me! I would absolutely recommend that you contact your 3D printer
support team if/when you have an issue. These are the problems that arose
during this project:
·
The filament jammed in the extruder. I had to
take the extruder motor apart on several occasions and now can do it without
asking for help from MakerBot Support. I know that the telltale “clicking”
requires me to unload the filament and remove whatever is jammed in the motor.
You can’t be leery about this task as it is very common and happened weekly
during our design challenge.
·
Humidity caused havoc with filament. I work in a
100-year-old building in a lab with no air conditioning. The least bit of
humidity in the air causes the filament to swell and not work through the
extruder. After realizing this, I had to adjust my printing schedule around the
weather. I’d get to school super early just to get a print started before the
change in the tech lab environment stopped our production. Maybe winter and
spring in New England is the best time for 3D printing!
·
The thermal barrier tube became blocked. This
was a bit trickier to fix than the simple filament jam. After unsuccessfully
trying to clear the blockage, I actually had to request a replacement part.
This presented us with an unforeseen delay in printing.
·
Prints weren’t printing correctly on the build
plate or were difficult to remove. Blue painters tape is a 3D printer’s best
friend. The full sheets of tape are great but a roll of 2-inch tape works just
fine too for covering the build plate and making prints easier to remove. I
would also suggest getting a putty knife or similar tool for aiding in the
removal of the prints. I learned rather quickly to set all designs to print
with a raft as well. It is super
important that you take the time to level the build plate at least daily; maybe
even after each print. All of these things will help with the final prints.
·
One of the plastic pulleys and belt wore out and
needed to be replaced. This was very challenging to fix. Although MakerBot was
great about sending me the X-axis belt, gantry bracket, idler pulley, dowel
pin, and PTFE grease needed to fix the problem, it was hard to do! It turned
into a two-person job with help from my building’s custodian. I can only
suggest keeping up with regular maintenance in hopes of not running into this
same problem. It took me several days to fix!
·
The printer made a dreadfully loud noise when
the extruder went to its “home” position. This issue was apparently caused by a
glitch with the stop end cable. Although not as difficult as the pulley and
belt replacement, this fix scared me the most! I actually had to deal with the
motherboard and feeding the cables through the machine and making sure
everything was attached correctly. It doesn’t sound like much but it sure did
intimidate me initially!
You may have a district computer technician who you can rely
on when something needs to be fixed with your printer. I would suggest checking
your district’s policy on this prior to getting a 3D printer. This way you’ll
know if you’re on your own or not. If you are, like I was, don’t hesitate to reach
out to the support team to help guide you through whatever issues arise.
5. The benefits of 3D printing far outweigh any potential problems!
There are so many awesome reasons to try 3D printing with
your students. The levels of enthusiasm and engagement as well as the multitude
of skills used by my students during the process were exciting to observe. The
daily collaboration among students and the way they could view me as a learner
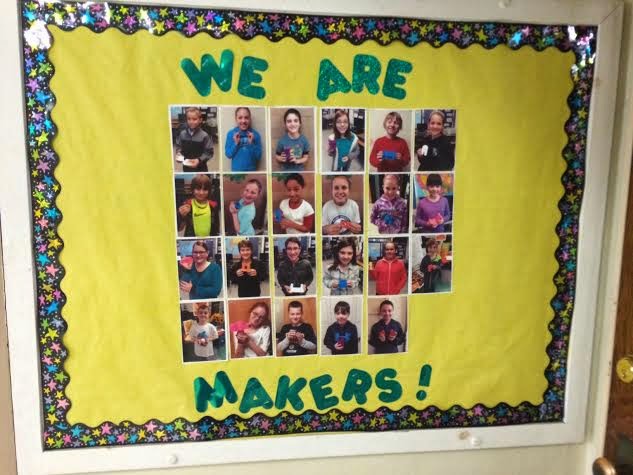
too were results I hadn’t anticipated. The pure joy and pride on each student’s
face as I took their picture with their completed design was priceless. My
students became designers and makers and were super proud of themselves! At the
conclusion of the project, I asked my students to complete a reflection survey on
what they learned, suggestions to improve the project and general
thoughts/comments. Here are several of their remarks:
“I liked how I could think of something
in my head that only I could design and not stores and it could be mine and it
was original.”
“I should've measured more carefully
because my size was much different than I wanted.”
“I learned that not everything
comes out perfect and to
be more patient.”
be more patient.”
“Keep calm! It can be hard,
frustrating, and annoying at times but try your hardest. Don't rush! AND SAVE, SAVE,
SAVE!!!!!”
“It was a challenge for me, but I took
it as a learning process. I am thrilled to see how my design turns out.”
“I liked that we were making stuff
to solve problems.”
“I learned just how important
measurements are.”
“I love printing in 3D. I love this
because, all of things that live in your imagination can finally come to life
in ways we thought that they never could.”
The last quote pretty much sums up why everyone should try
to get a 3D printer for his or her school! Feel free to leave a comment,
question or contact me directly at kjwinsper@gmail.com
if I can help you on your quest with 3D printing.
This post was originally written as a guest blog submission on Fractus Learning.


.jpg)